Last updated Oct 1, 2026
Purpose. This guide explains how to configure the Star Micronics printer with a static LAN connection, connect the printer and external camera through the iPad adapter, and verify both devices in the Athena Security Visitor Management System.
Equipment needed
iPad with the Athena Security Visitor Management Entryway app
Star Micronics mC-Label3 printer with power cable
Multiport USB-C adapter connected to the iPad
USB-C to USB-C cable for initial printer configuration
Ethernet cable for the final printer connection
Separate USB-C charging cable and standard power adapter
USB-A external camera
Star Quick Setup Utility app installed on the iPad
Network settings at a glance
Important. The printer and iPad use different IP addresses on the same subnet. Do not assign 192.168.8.55 to both devices.
1 Connect the printer directly for initial setup
Power on the Star Micronics printer
Connect the iPad directly to the printer using the USB-C to USB-C cable. For this initial step, do not route the printer through the multiport adapter
Download and open the Star Quick Setup Utility app
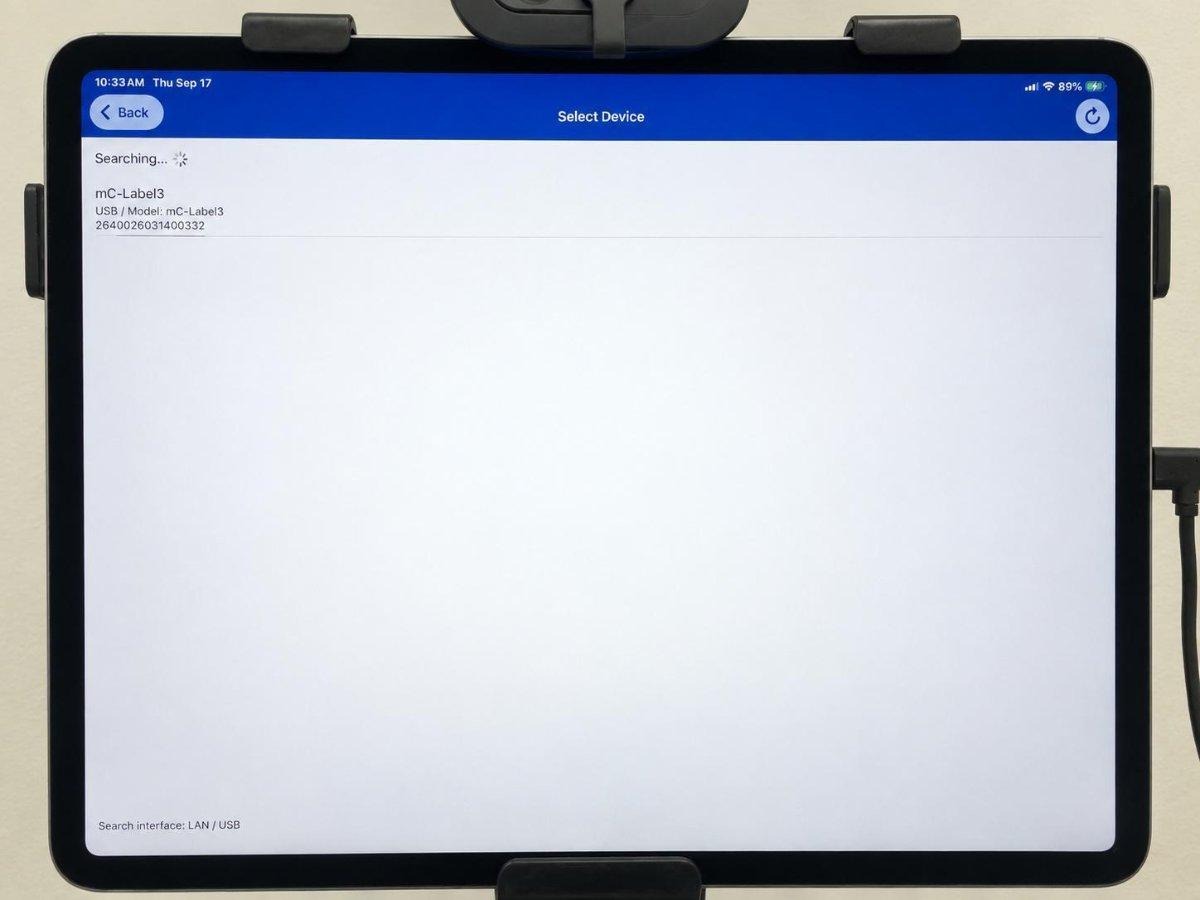
At the top of the screen, tap Select to search for a connected device
When mC-Label3 appears, tap the printer name
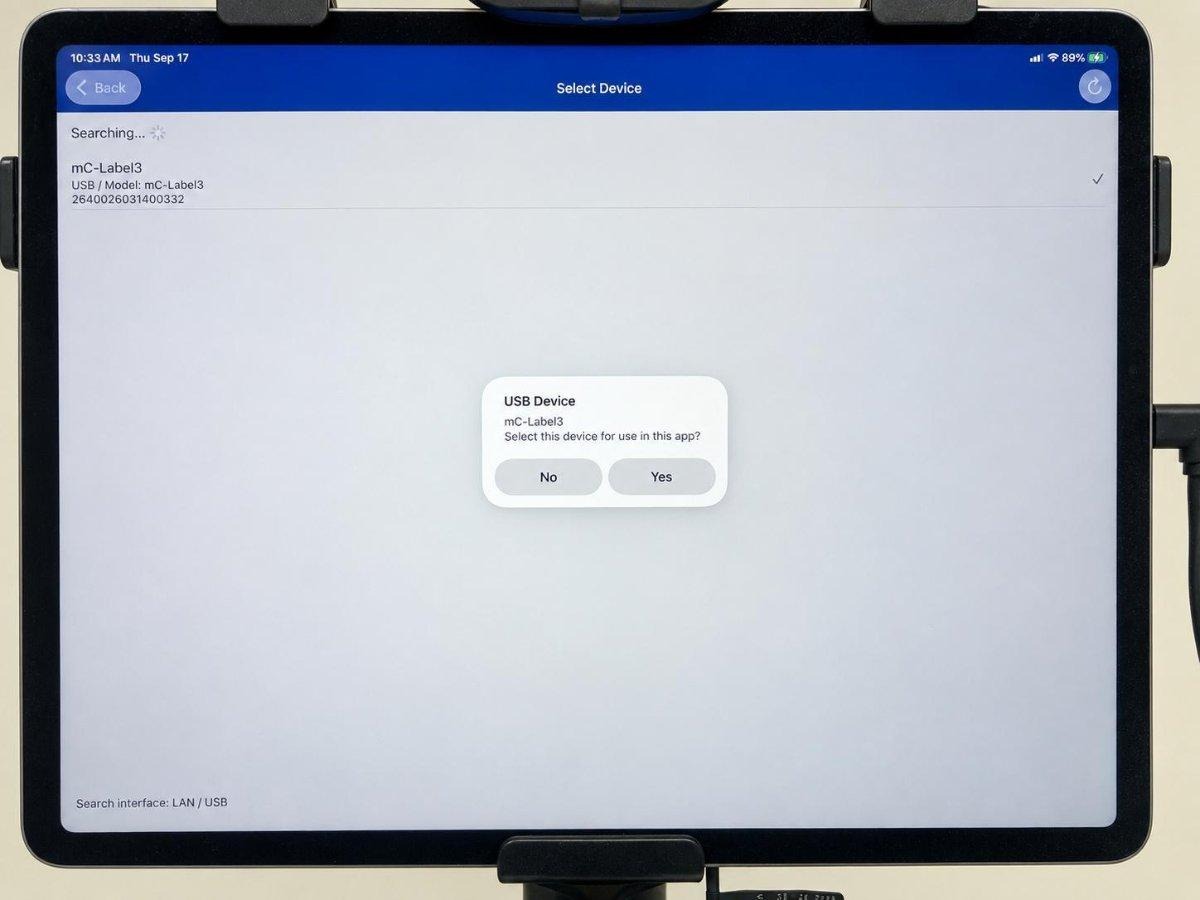
When asked whether to select the device for use in the app, tap Yes
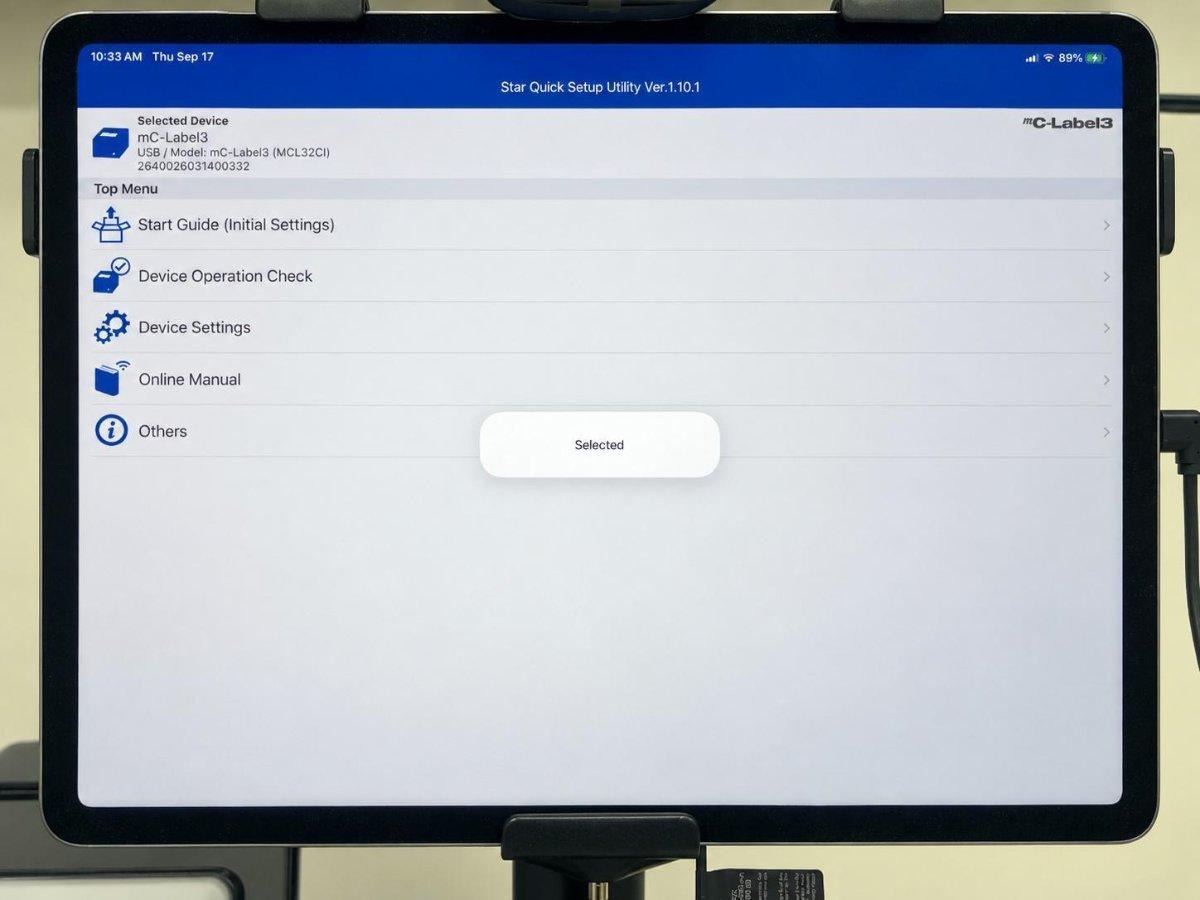
Wait for the confirmation that the printer is Selected
2 Assign the printer static IP address
From the Star Quick Setup main menu, tap Device Settings
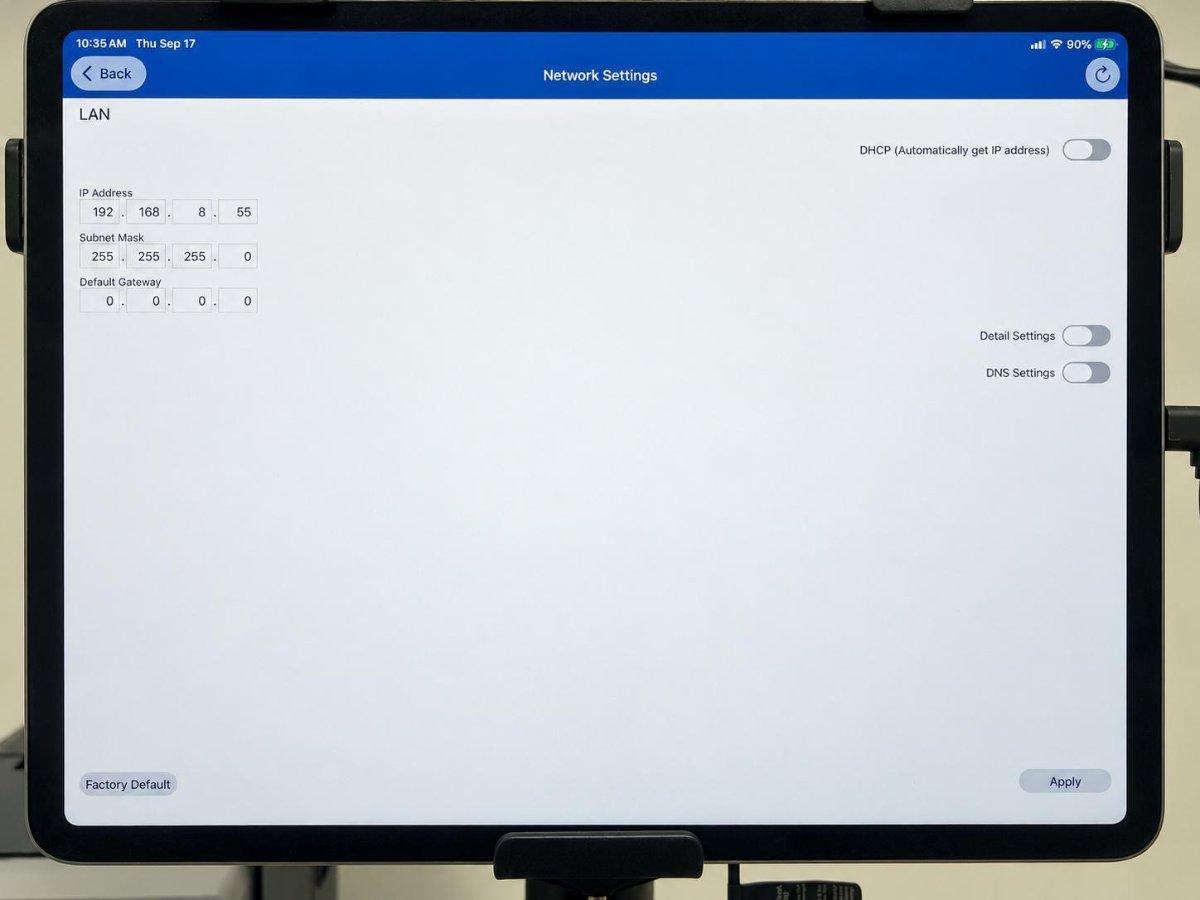
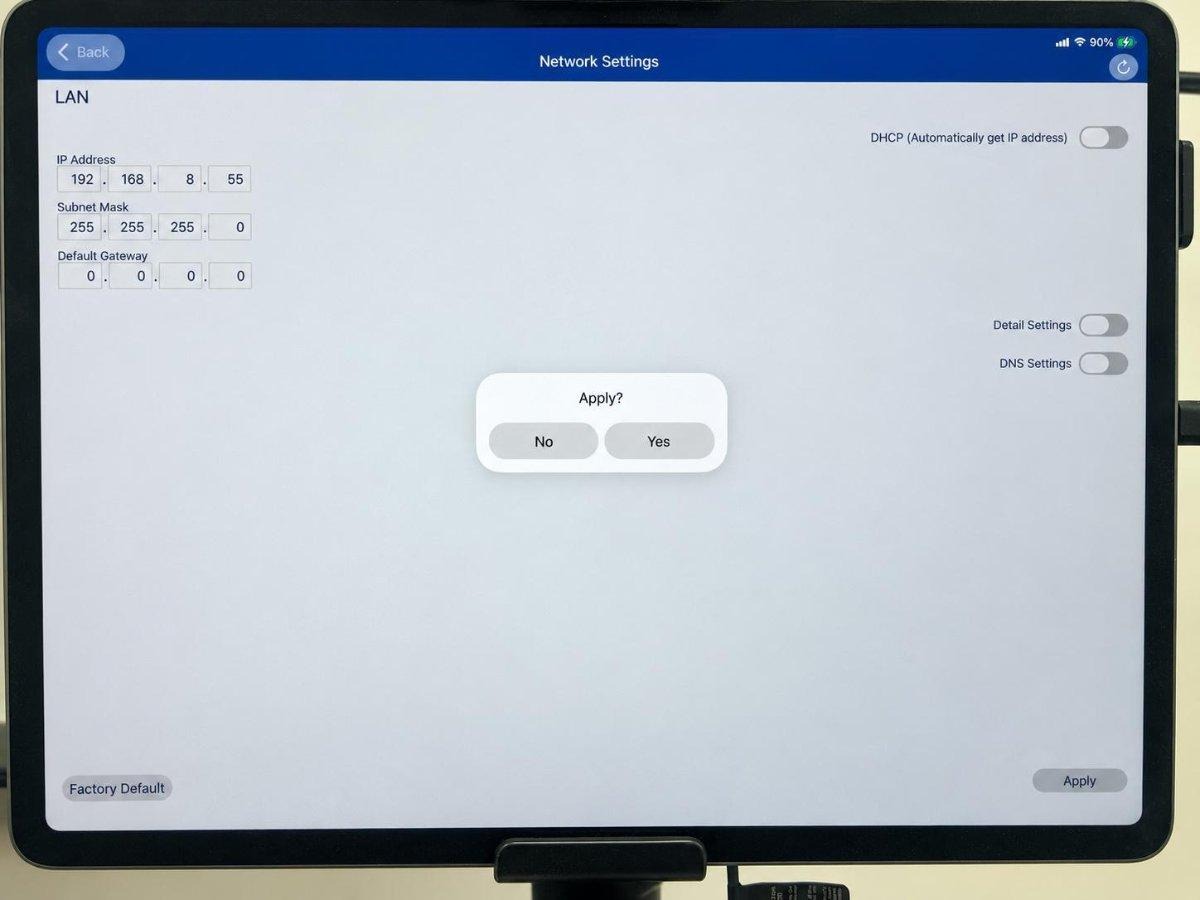
Open Network Settings
Turn off DHCP Automatically get IP address
Enter IP address 192.168.8.55
Enter subnet mask 255.255.255.0
Enter default gateway 0.0.0.0
3 Apply and confirm the printer settings
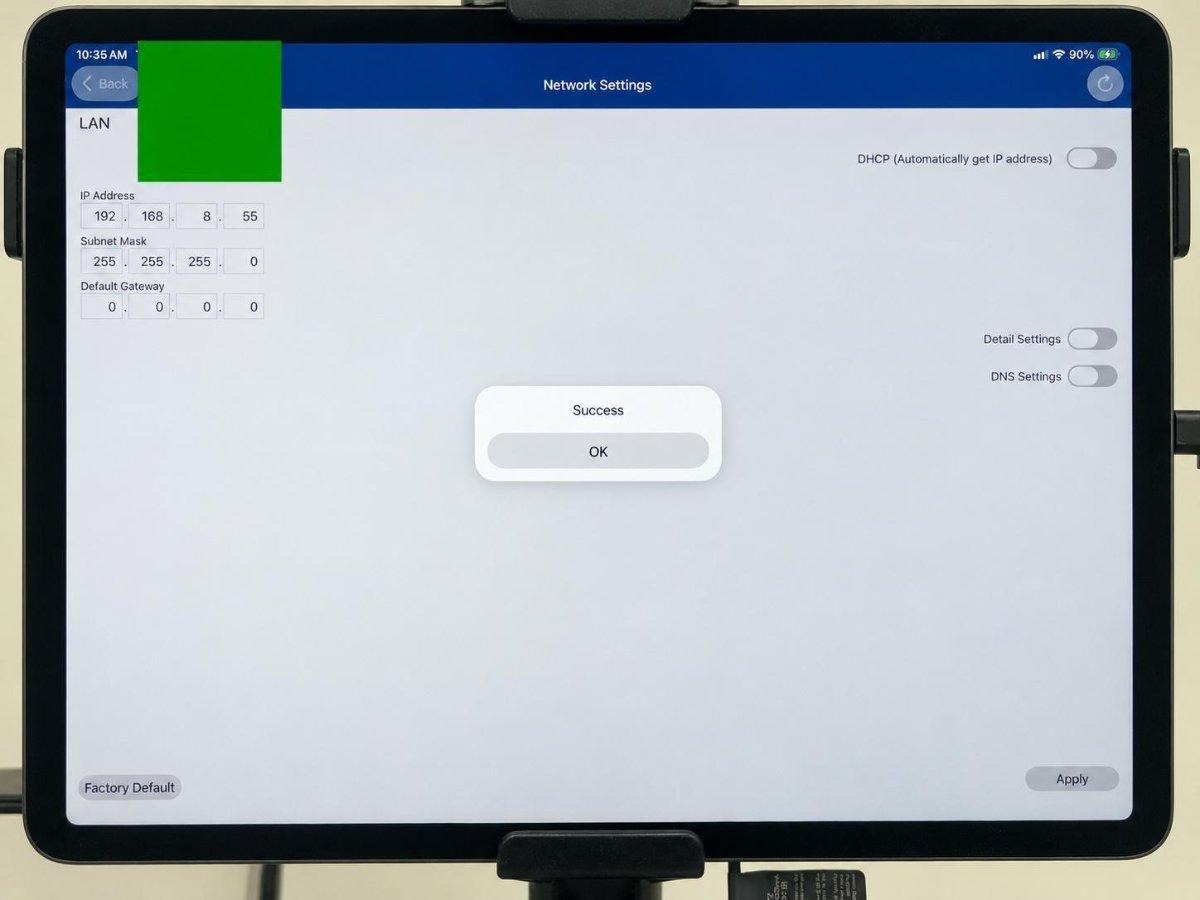
Verify the IP address, subnet mask, and default gateway before continuing.
Tap Apply in the lower-right corner.
When the confirmation box appears, tap Yes.
When Success appears, tap OK.
Tap Back in the upper-left corner, then close the Star Quick Setup app.
4 Reconnect the printer through the iPad adapter
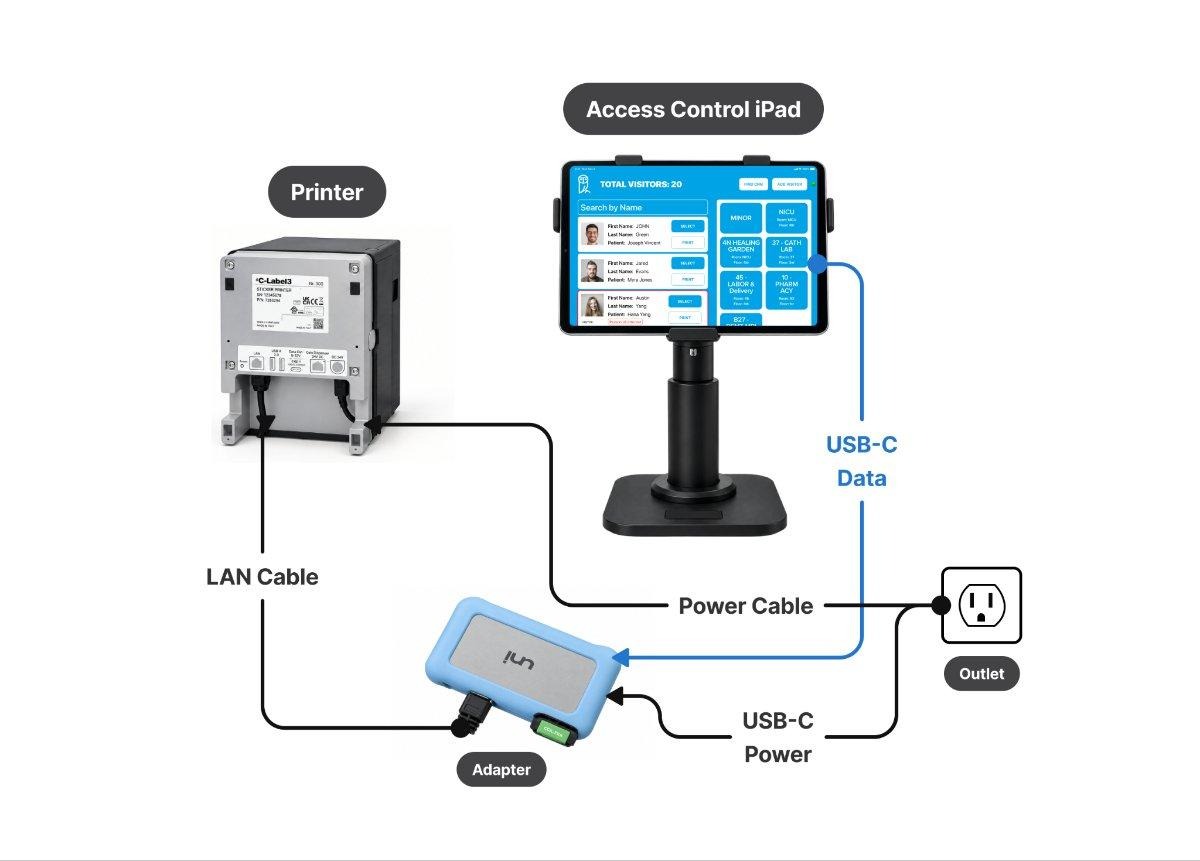
Disconnect the USB-C cable from the printer
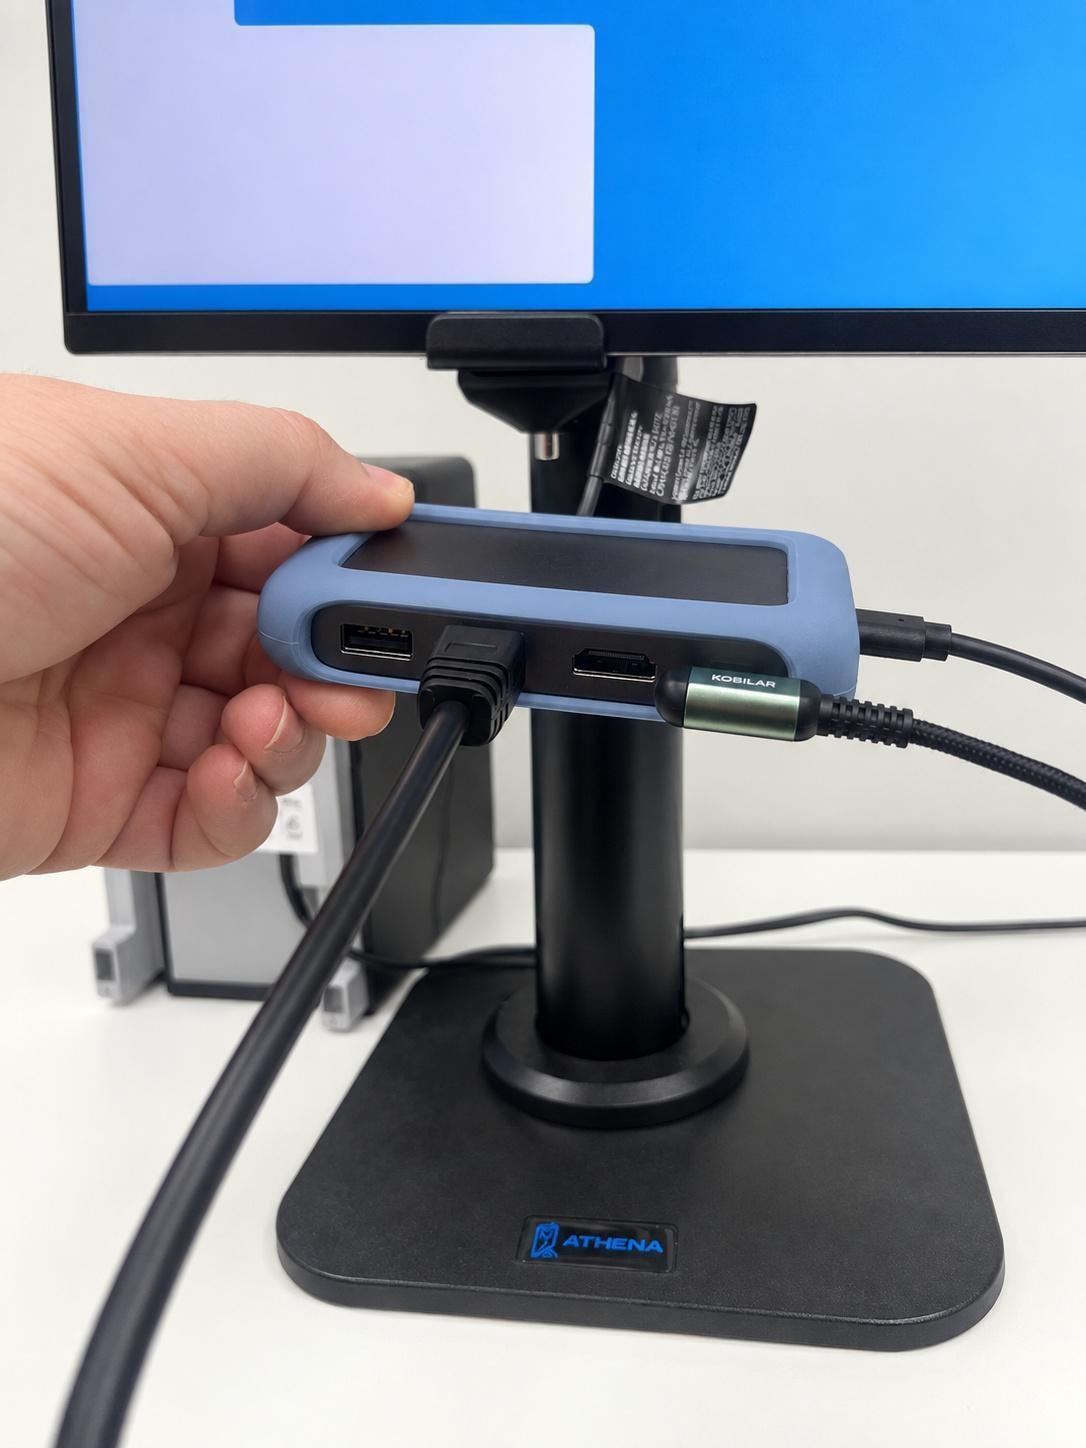
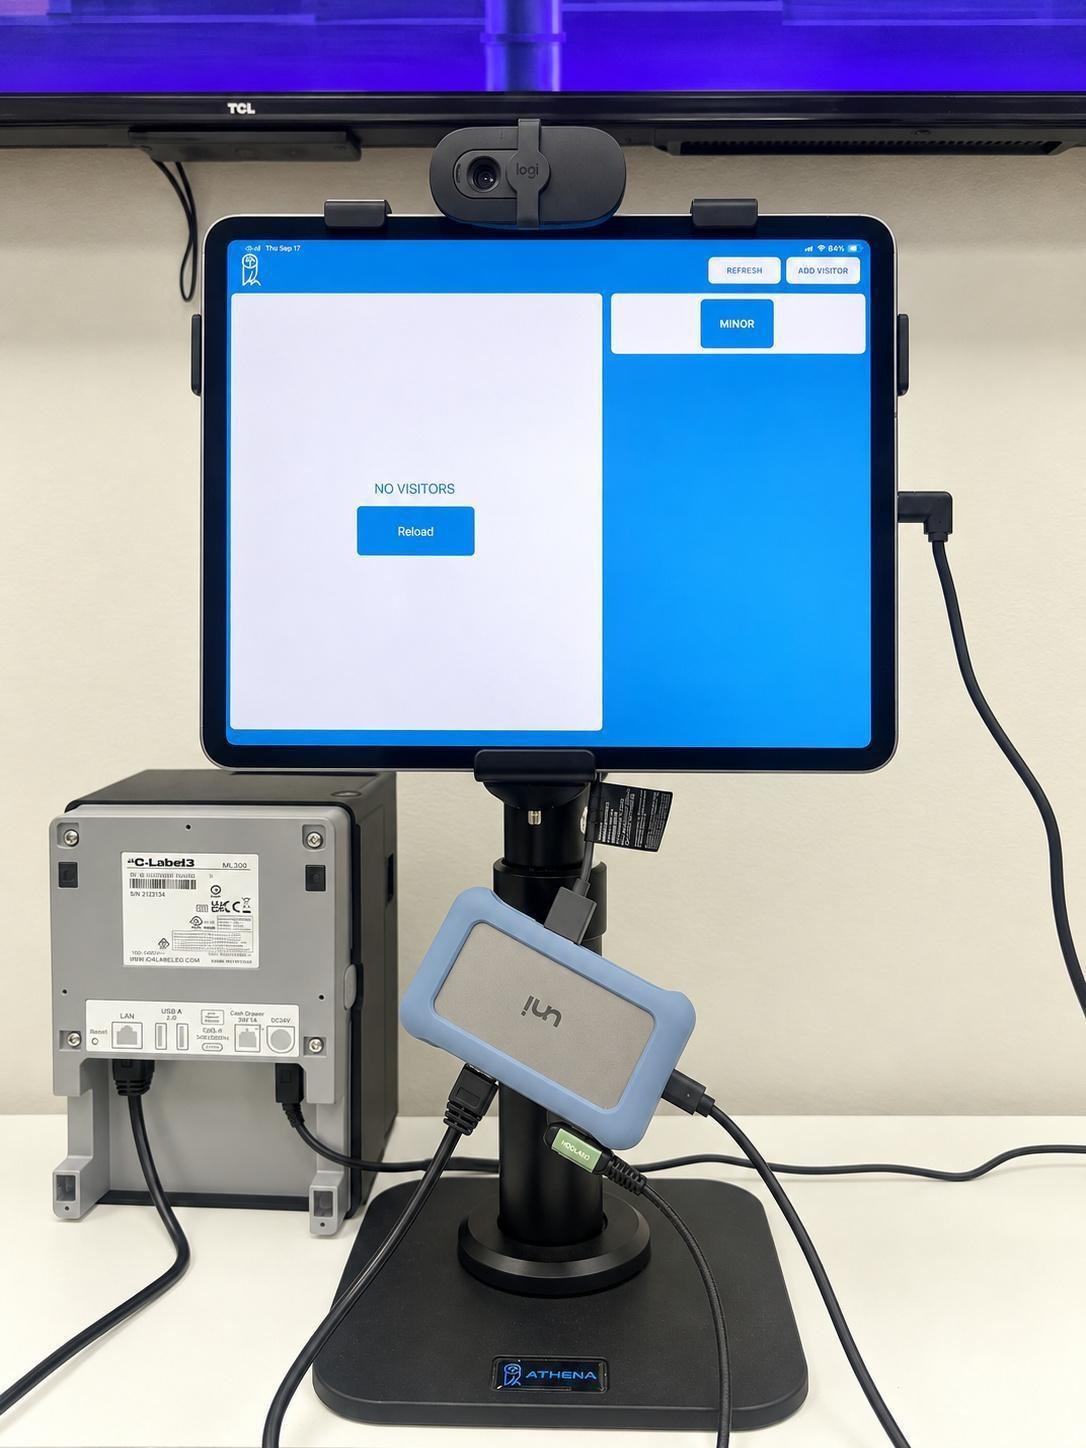
Connect the USB-C cable to the data port on the short side of the multiport adapter, with the other end still connected to the iPad
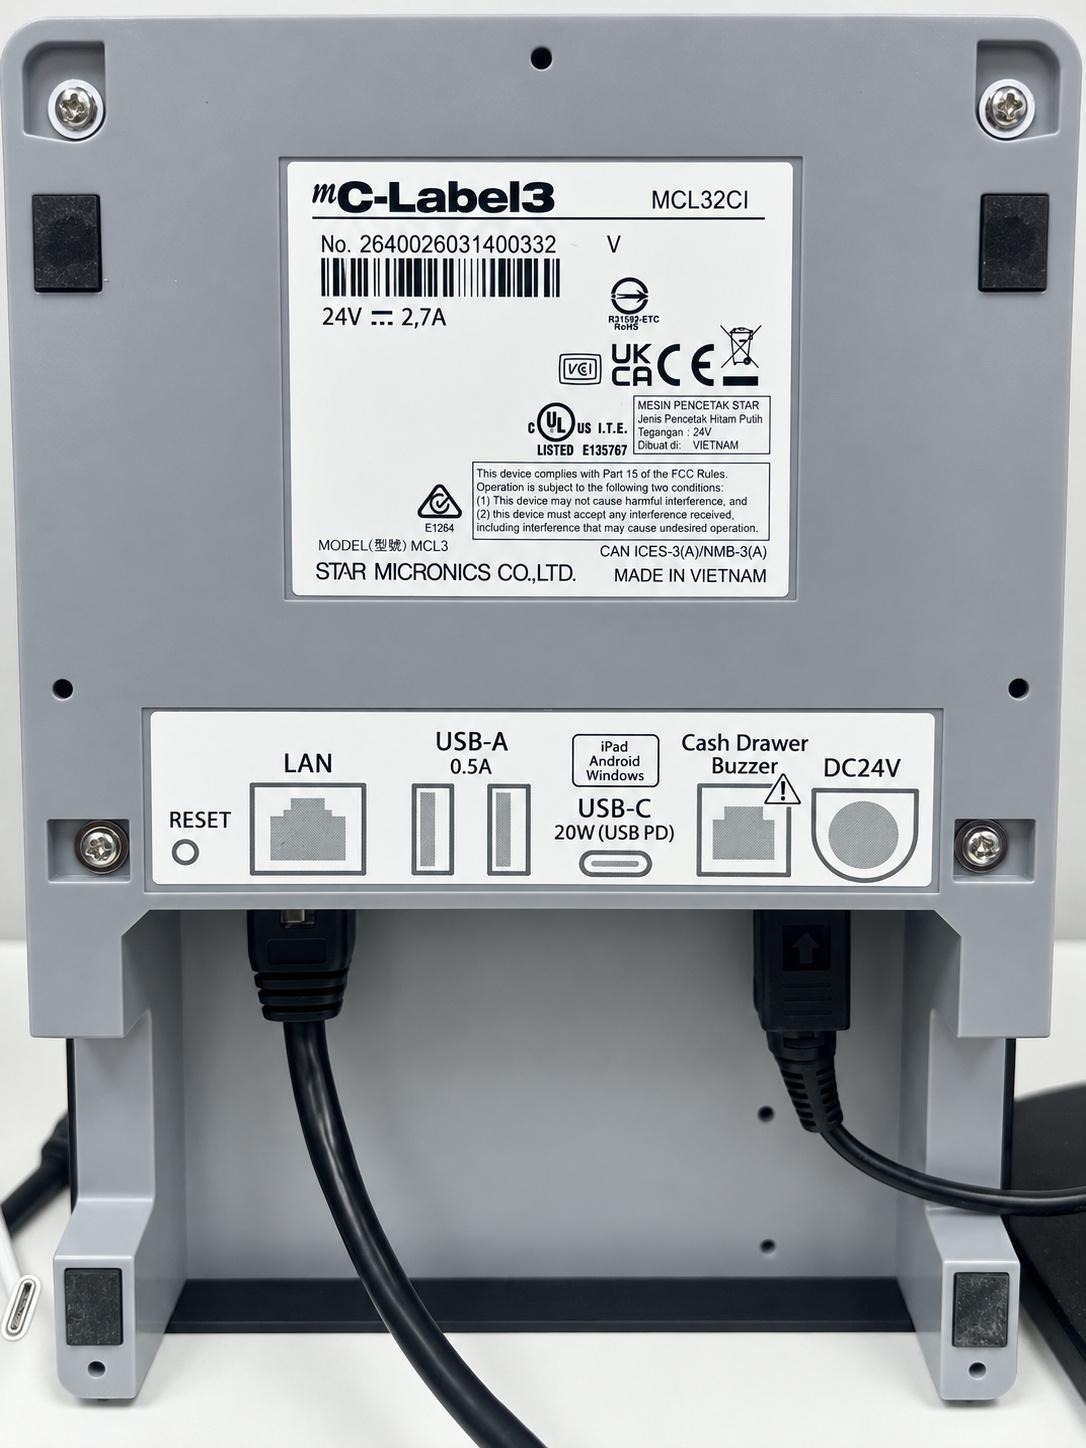
Connect one end of the Ethernet cable to the adapter
Connect the other end of the Ethernet cable to the LAN port on the back of the printer
Keep the printer power cable connected to the DC24V port
5 Configure the iPad Ethernet address
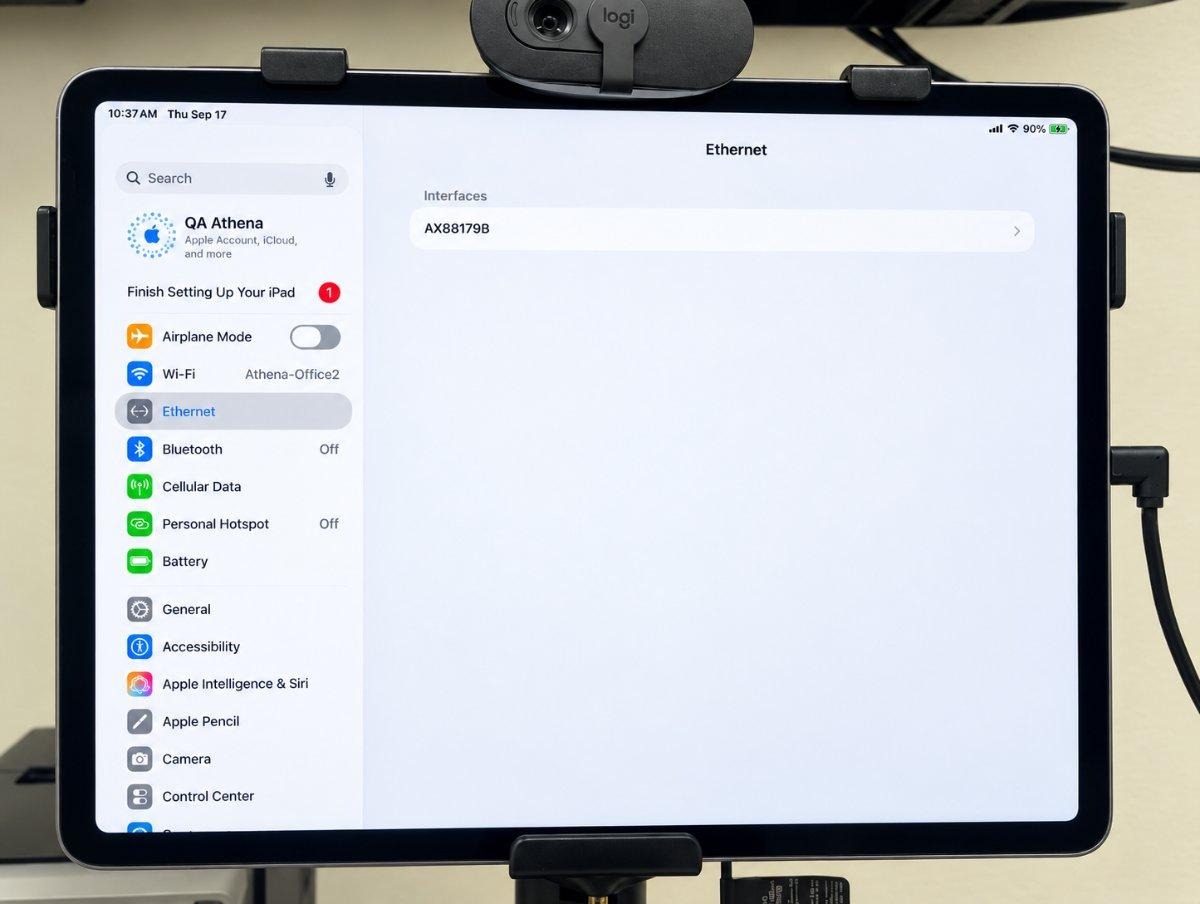
Open the iPad Settings app
Tap Ethernet in the left navigation
Under Interfaces, tap the displayed Ethernet interface
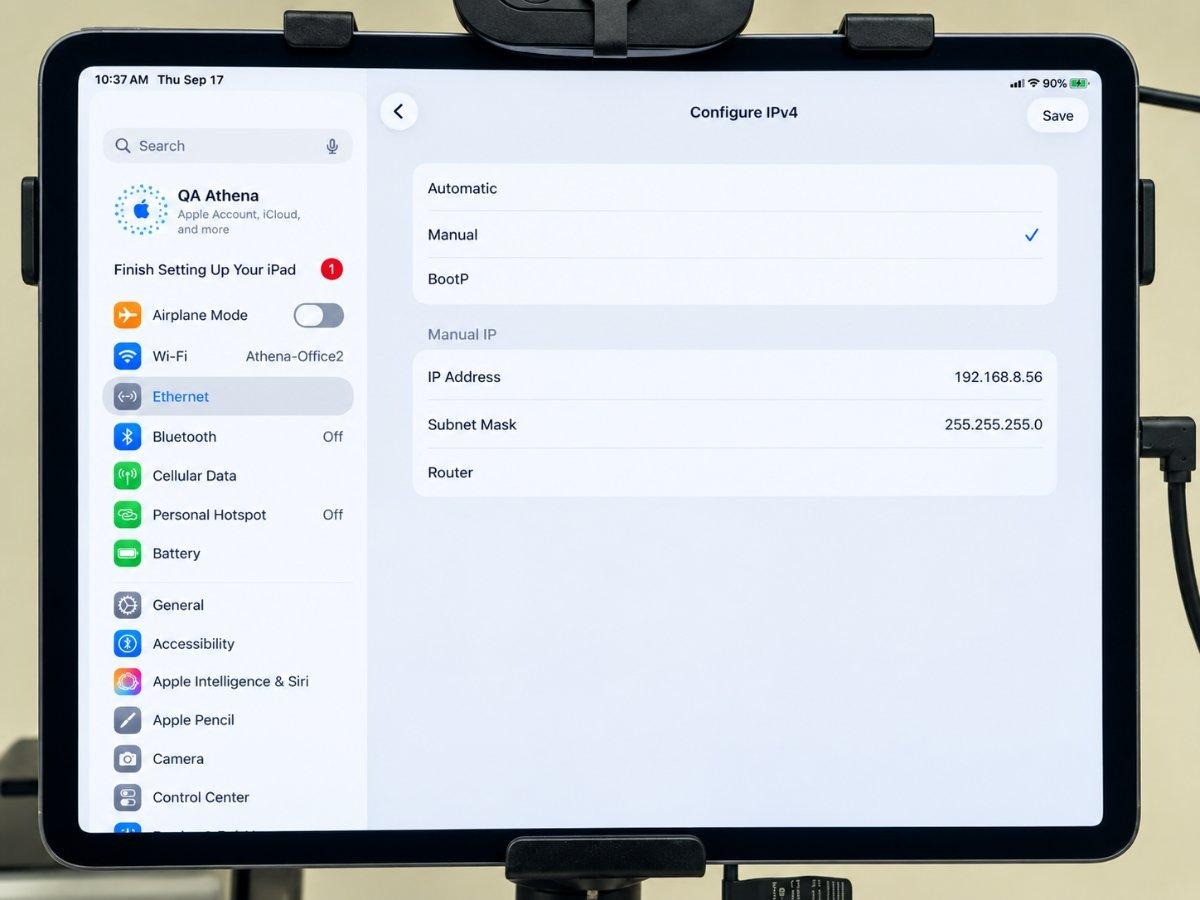
Tap Configure IP and change the selection from Automatic to Manual
Enter IP address 192.168.8.56
Enter subnet mask 255.255.255.0
Leave Router blank, then tap Save
6 Confirm the Ethernet settings and printer connection
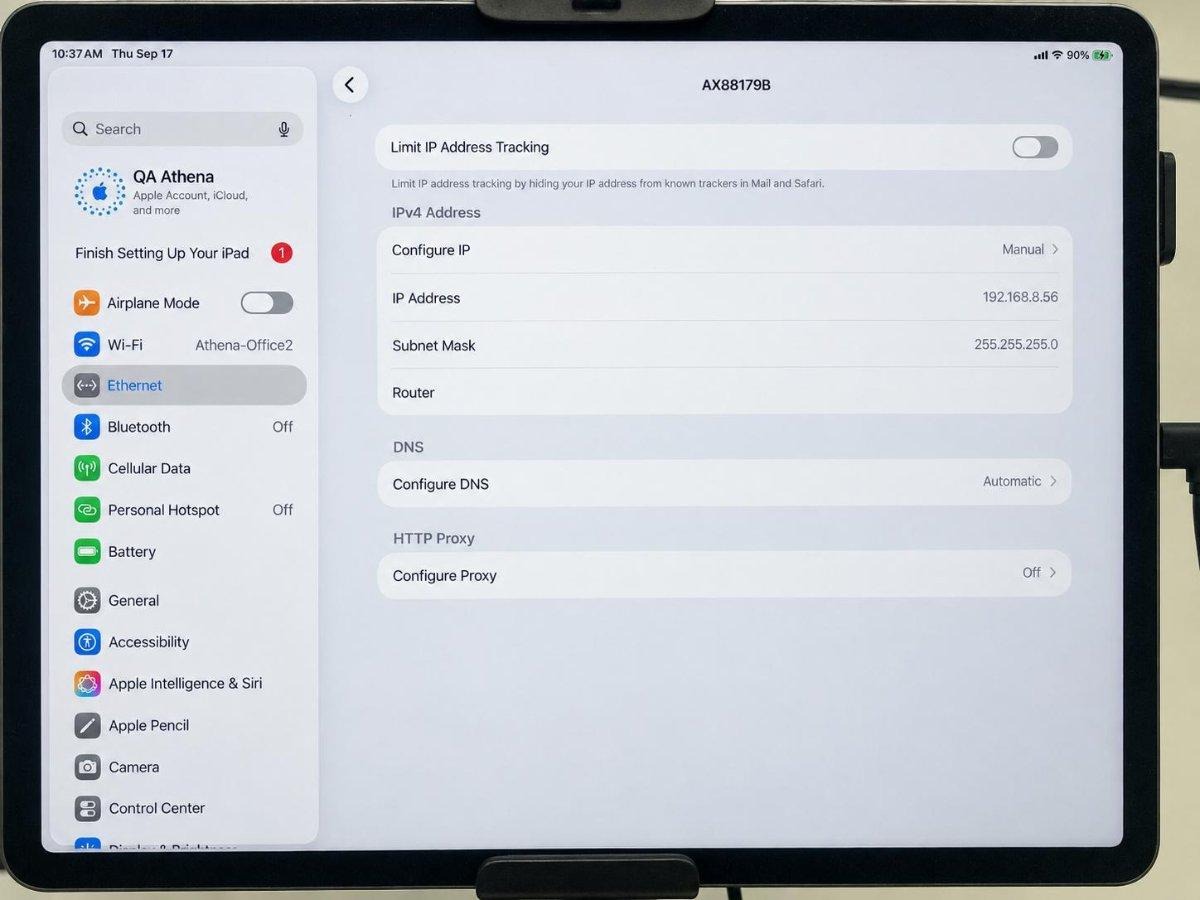
Confirm that Configure IP shows Manual
Confirm IP address 192.168.8.56 and subnet mask 255.255.255.0
Close iPad Settings and reopen the Star Quick Setup Utility app
Confirm that the mC-Label3 printer is still available before continuing
7 Select the printer in Athena VMS
Open the Athena Security Visitor Management Entryway app.
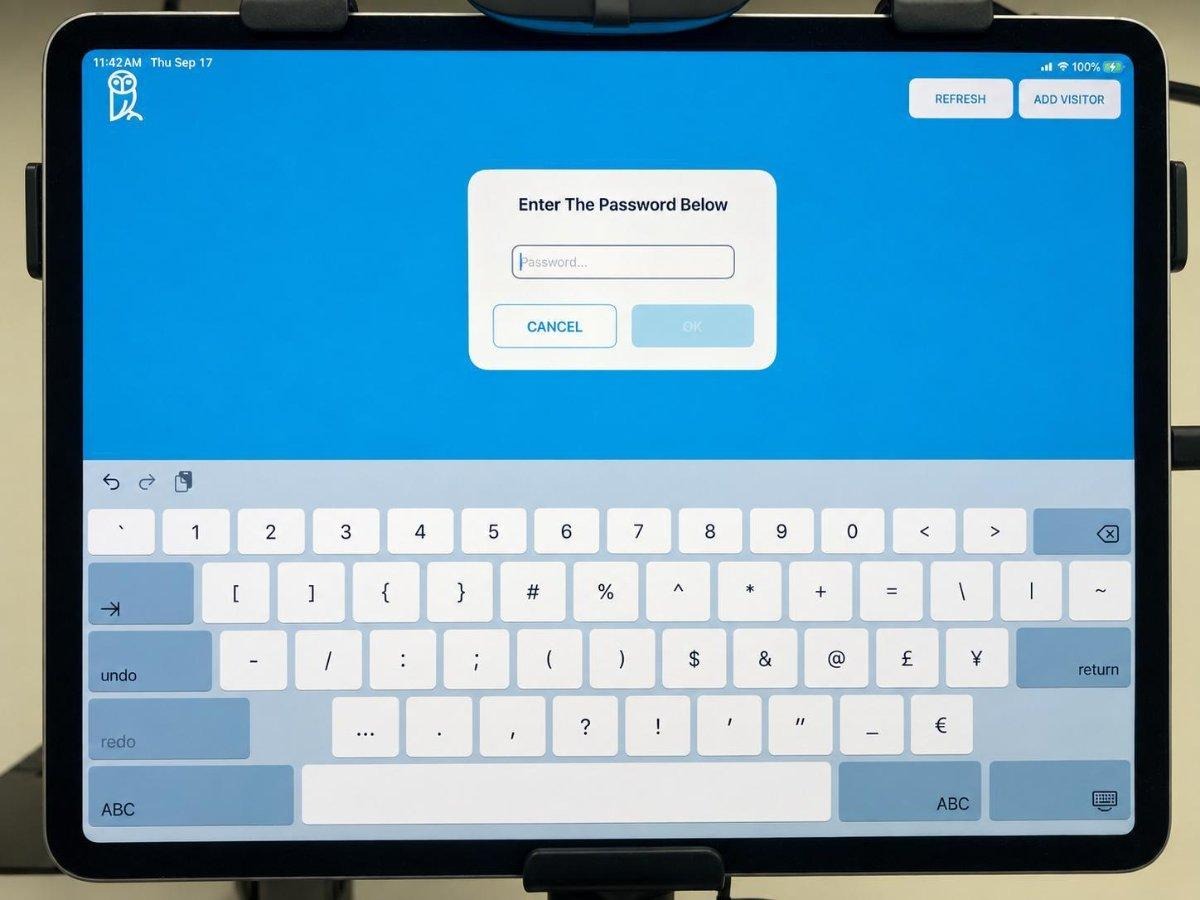
Open Settings and enter the Settings password.
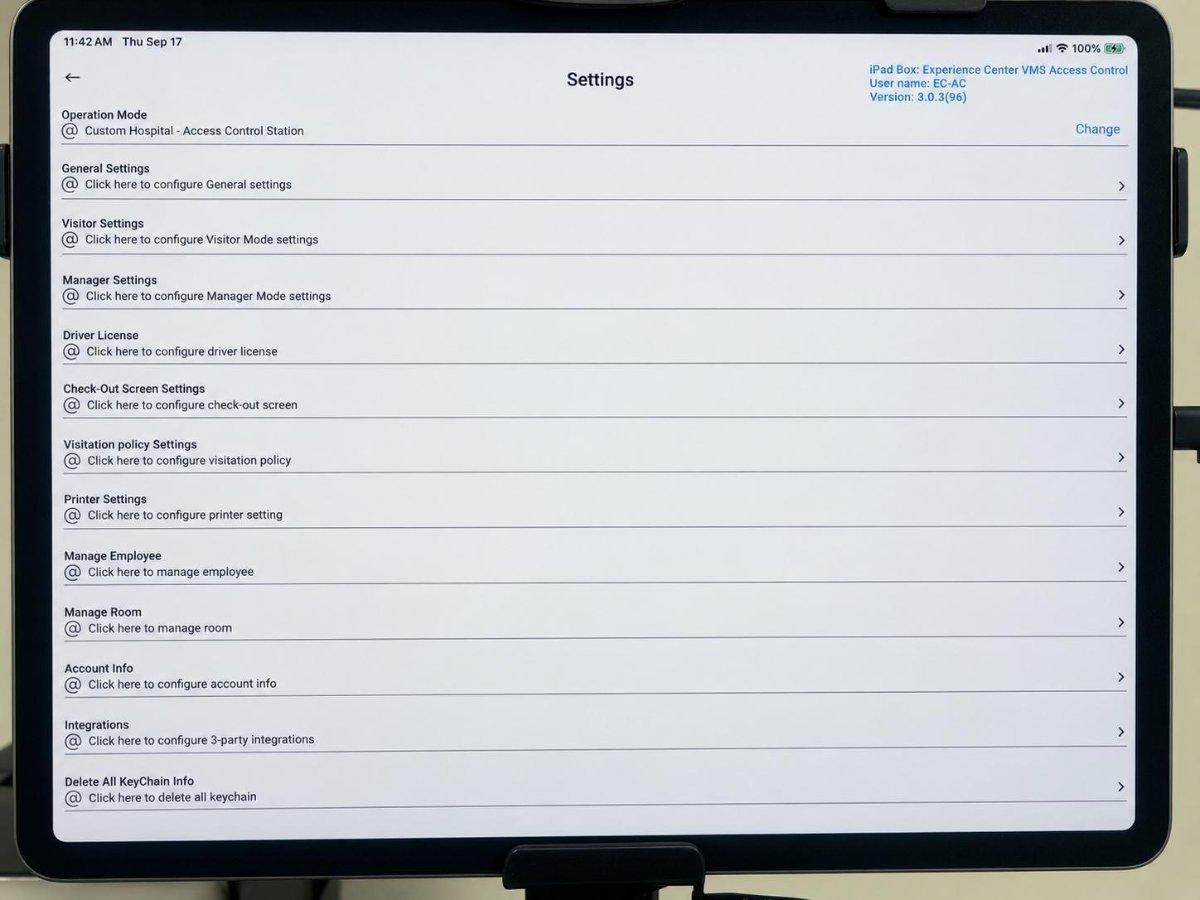
Tap Printer Settings.
Tap Star Printer Settings.
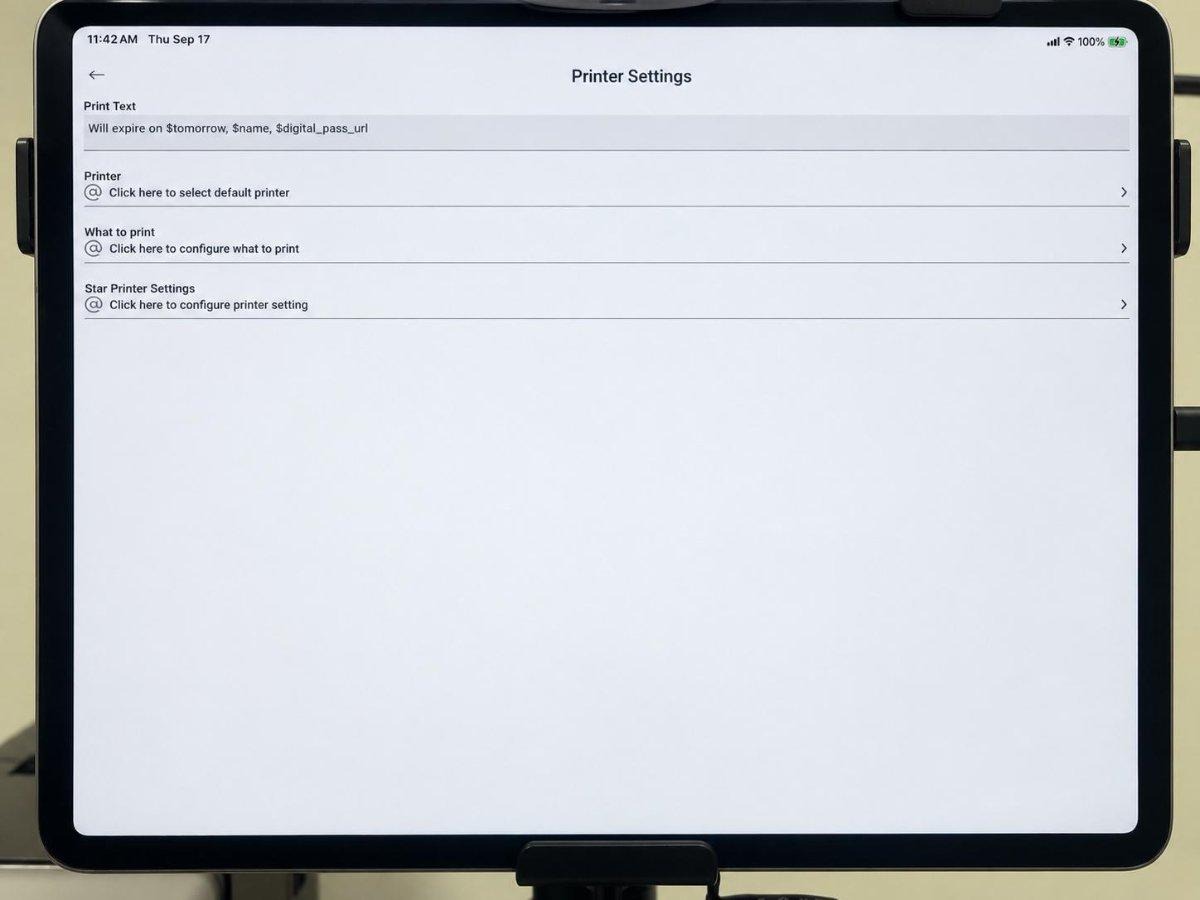
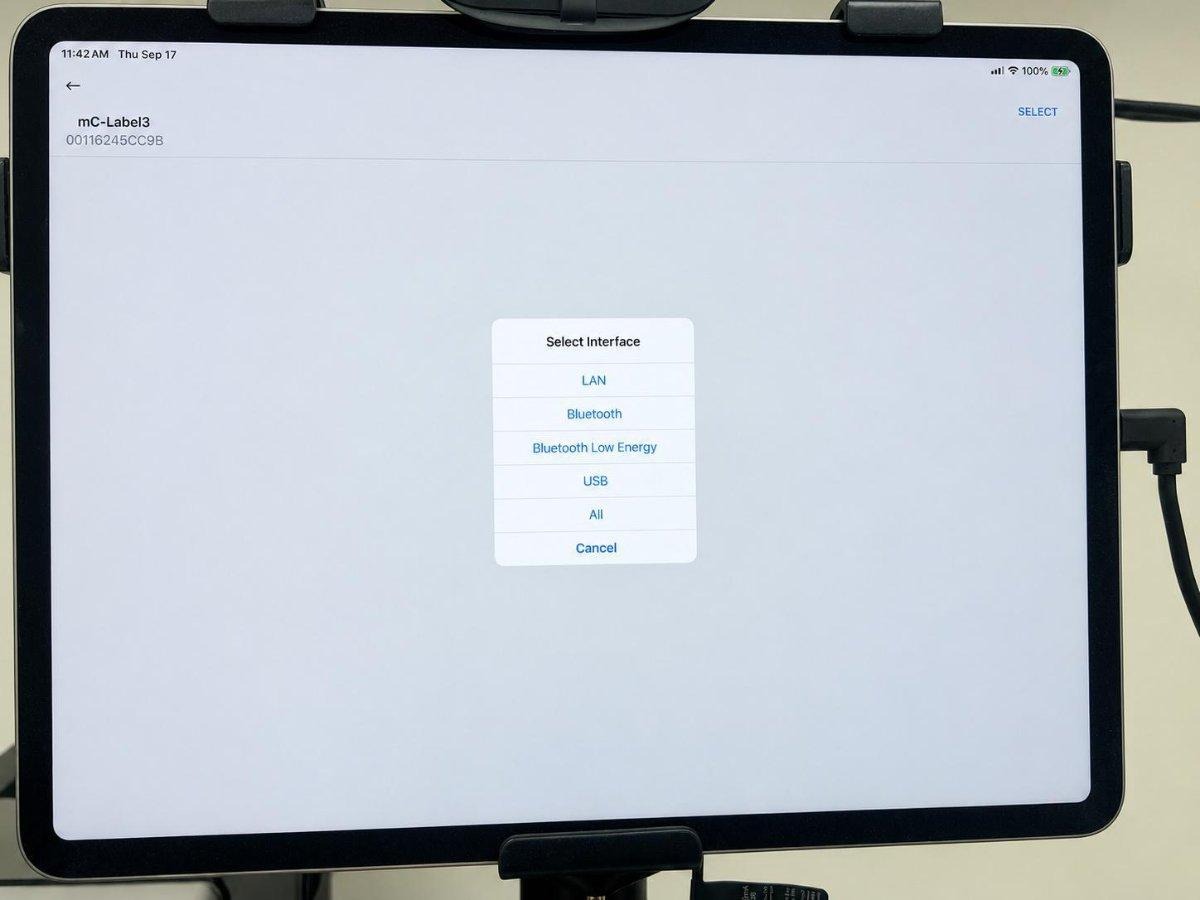
Tap Select, choose LAN, and wait for the search to complete.
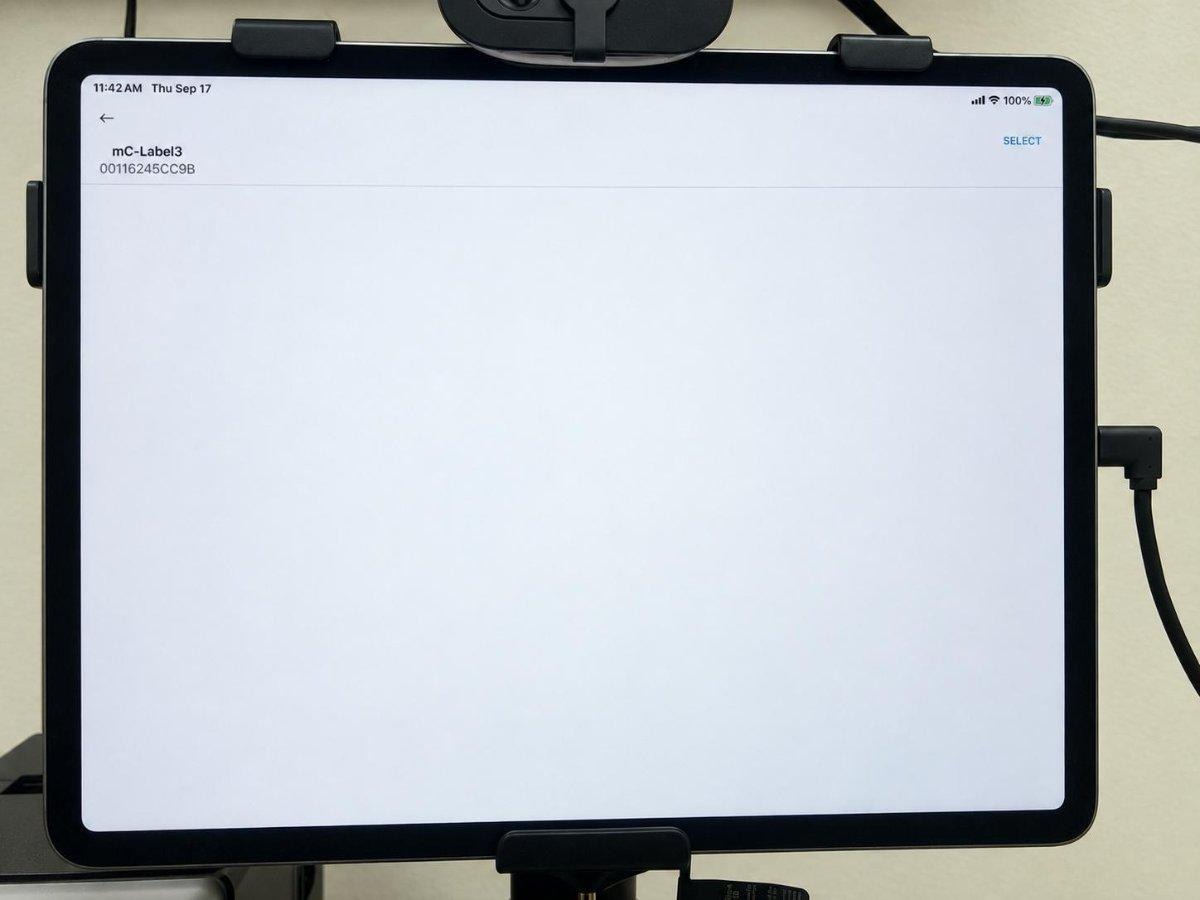
When mC-Label3 appears, tap the printer entry, then return to the app.
8 Search for the printer over LAN
9 Connect power and the external camera
Connect a separate USB-C charging cable to the adapter.
Connect the other end to a standard power adapter and electrical outlet.
Confirm that the charging indicator appears in the upper-right corner of the iPad.
Connect the external camera USB-A cable to the adapter USB-A port.
10 Select the external camera in Athena VMS
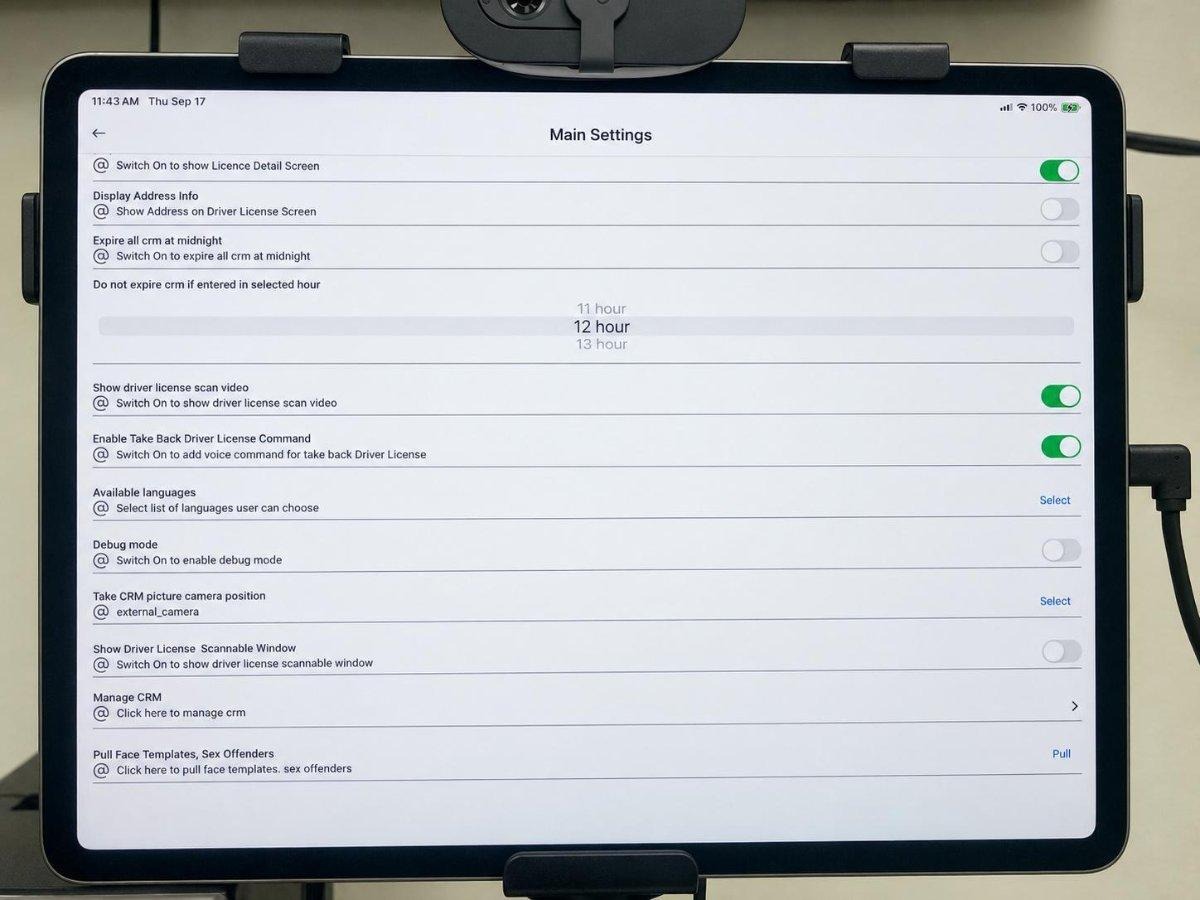
In the Athena VMS app, open Settings and enter the Settings password.
Tap General Settings.
Scroll to Take CRM picture camera position.
Tap Select and choose External Camera.
Tap Back to return to the main screen.
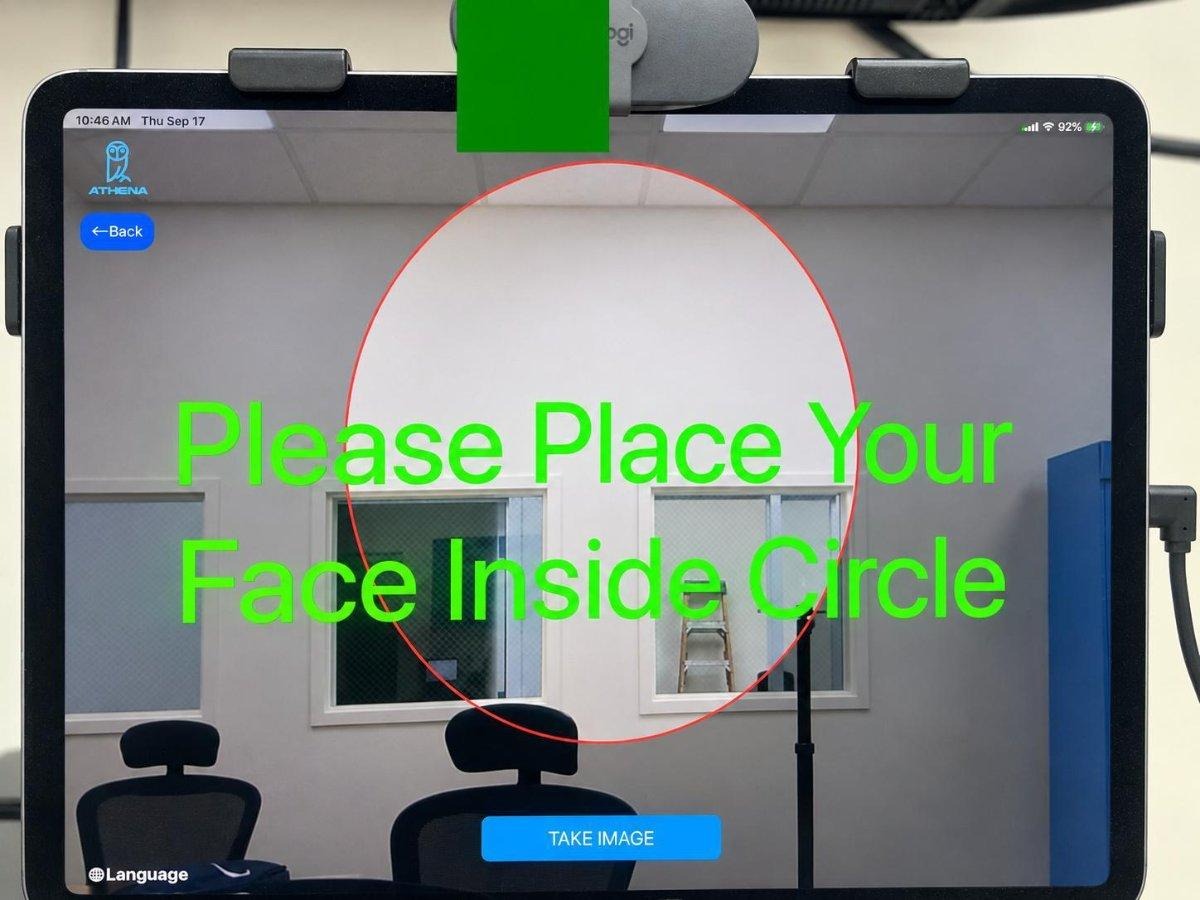
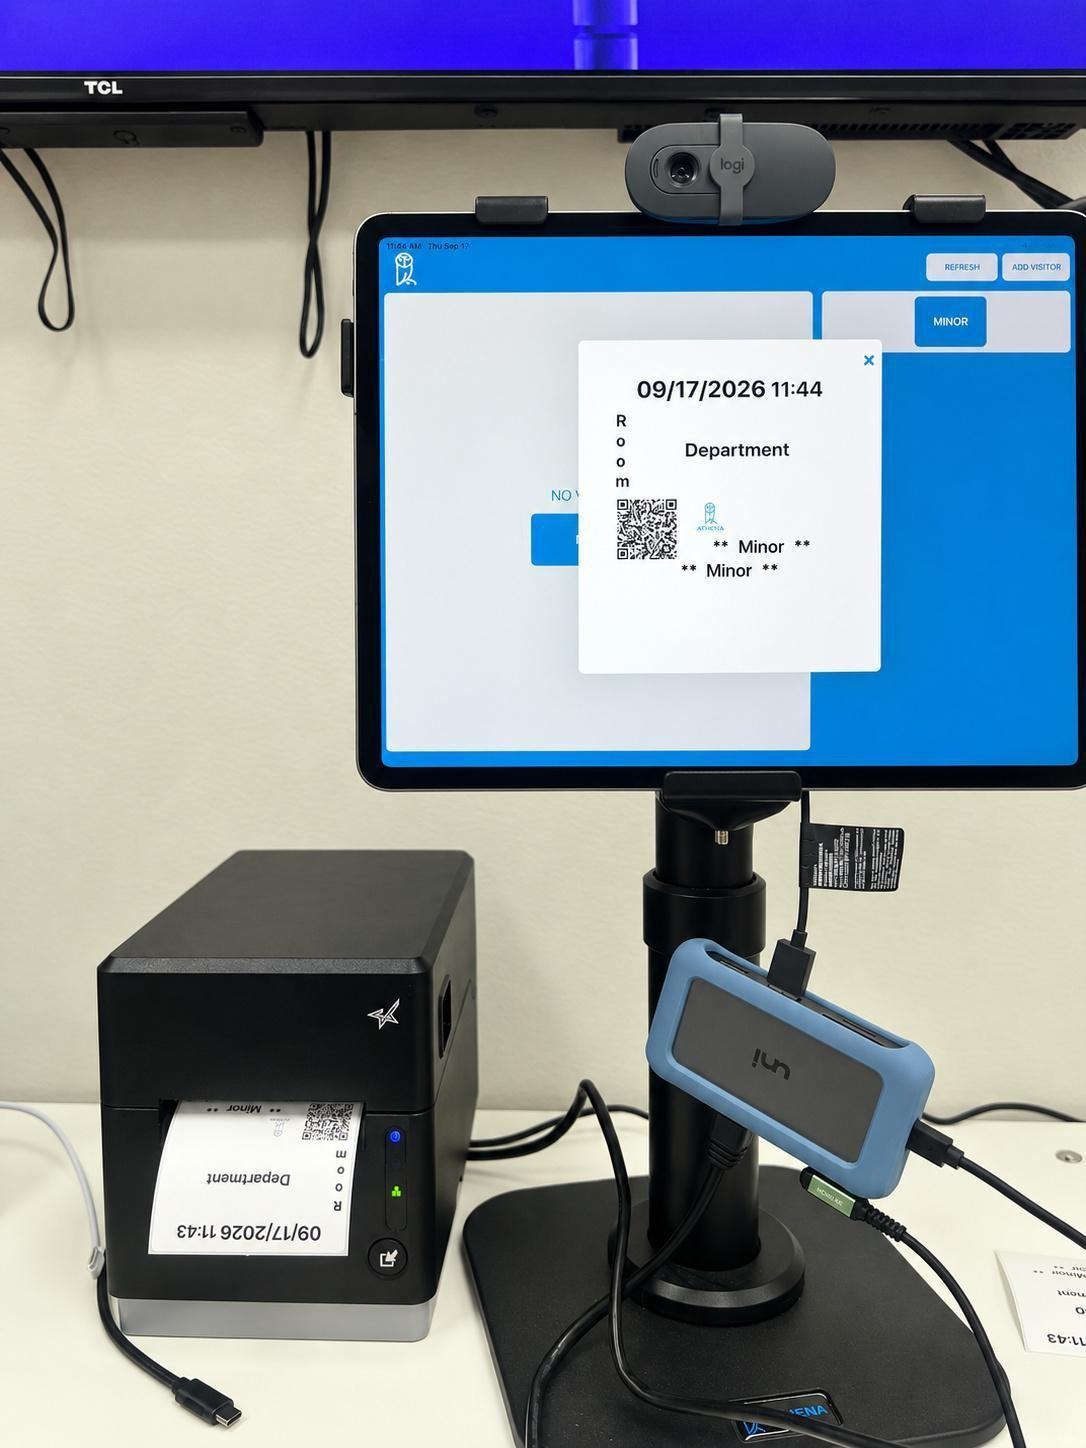
11 Test the completed station
Final verification
☐ Printer IP address is 192.168.8.55
☐ iPad Ethernet IP address is 192.168.8.56
☐ Both devices use subnet mask 255.255.255.0
☐ Printer is selected through LAN in Athena VMS
☐ External Camera is selected for CRM pictures
☐ iPad shows the charging indicator
☐ Test photo and test badge print are successful
Athena Security · 248 Addie Roy Road, Suite C101, Austin TX, 78746 · www.athena-security.com
Was this article helpful?
That’s Great!
Thank you for your feedback
Sorry! We couldn't be helpful
Thank you for your feedback
Feedback sent
We appreciate your effort and will try to fix the article